
Credits: Hadokken for the Commando strategy · LilGMan for the Spear strategy
Contributors: Walloper
Overview
One of the fastest missions to complete in Any%, along with Blitz: Search and Destroy. The usual way was to split from the most equidistant landing point, run to the bunker and throw an ![]() Orbital Laser on it. Although this strategy is still viable, a faster one focuses the use of the
Orbital Laser on it. Although this strategy is still viable, a faster one focuses the use of the ![]() Commando stratagem - with
Commando stratagem - with ![]() Anti-Tank Emplacement as backup.
Anti-Tank Emplacement as backup.
You can also be even faster by using the ![]() Spear support weapon. However, the
Spear support weapon. However, the ![]() Commando is less fickle in terms of aiming. In a scouted context,
Commando is less fickle in terms of aiming. In a scouted context, ![]() Spear is preferable. In an un-scouted context, especially during an operation speedrun, the
Spear is preferable. In an un-scouted context, especially during an operation speedrun, the ![]() Commando &
Commando & ![]() Anti-Tank Emplacement duo is preferable. In both cases, you have to aim for the same weak spot of the bunkers.
Anti-Tank Emplacement duo is preferable. In both cases, you have to aim for the same weak spot of the bunkers.
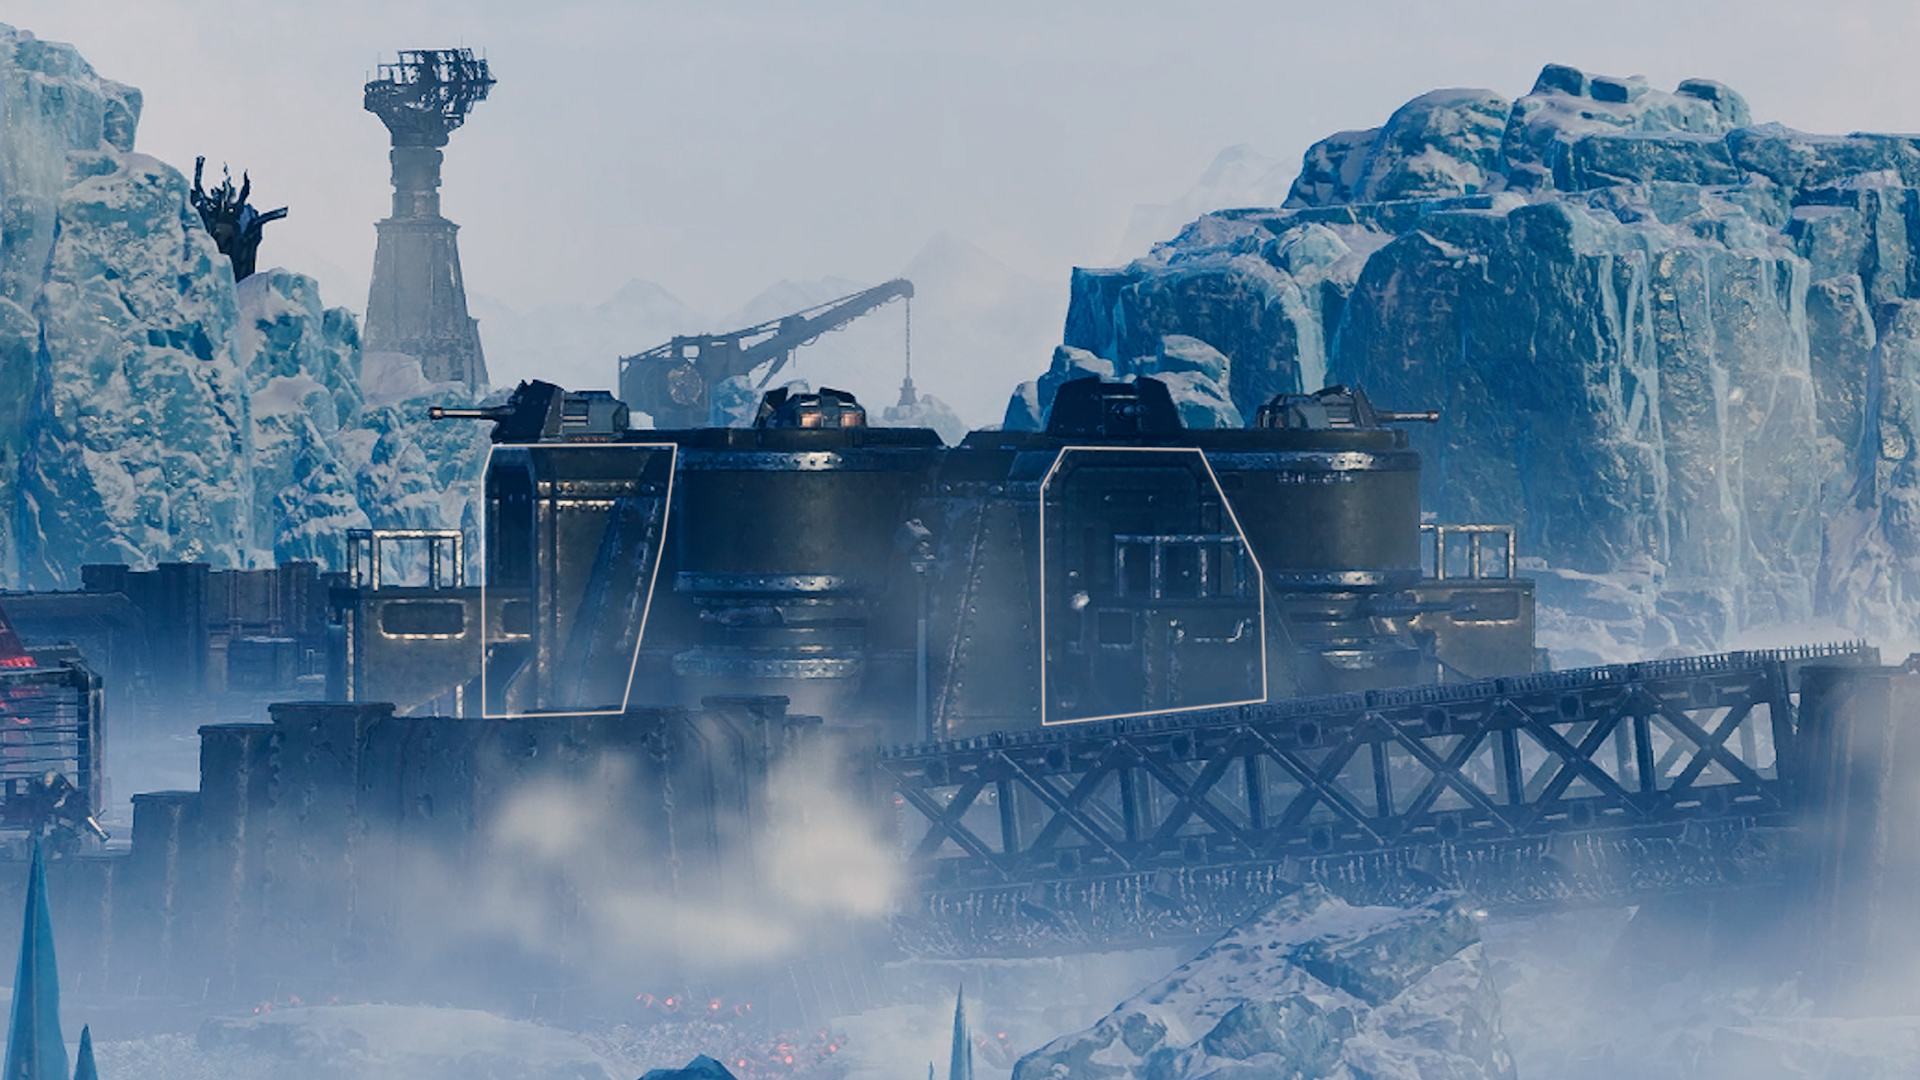
Bunkers are more or less square structures with a turret atop each corner. You want to aim for any point in the vertical continuity of one of these top turrets. With the ![]() Spear, it will be a one-shot deal. With the
Spear, it will be a one-shot deal. With the ![]() Commando, you'll have to fire four times. The most obvious advantage is the ability to fire from a great distance - the
Commando, you'll have to fire four times. The most obvious advantage is the ability to fire from a great distance - the ![]() Commando absence of bullet drop and auto-aim gives it a huge range.
Commando absence of bullet drop and auto-aim gives it a huge range.
Unlike orbital cannons which can be seen and heard from quite a distance, bunkers are harder to spot in an un-scouted operation with the Poor Intel - Objective locations are hidden modifier.
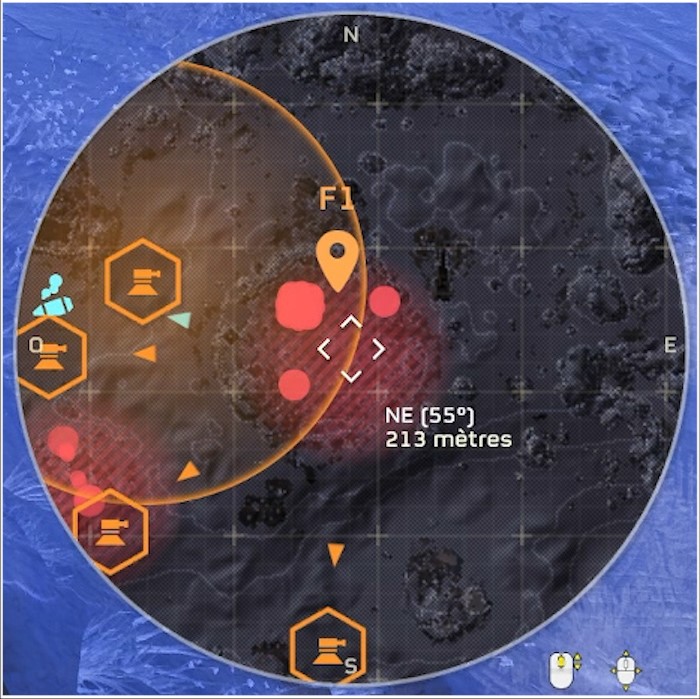
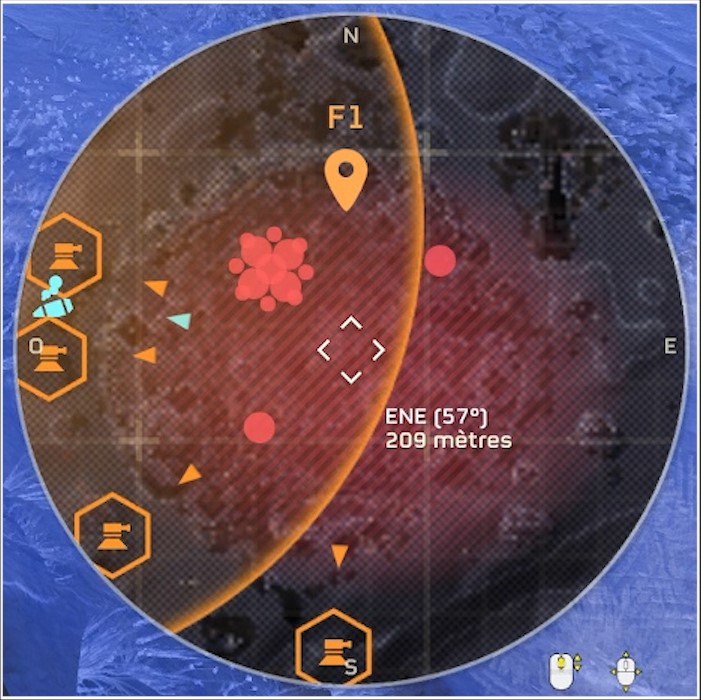
To spot your bunker as soon as you land, you'll need a ![]() Scout armour. Scan the red areas with your pin for a shape like the one shown below. It's a bigger, squarer dot than the fabricators/Scout Strider/Hulk/Tanks/Cannon Turret. When you zoom in to the maximum, the shape is much more distinguishable.
Scout armour. Scan the red areas with your pin for a shape like the one shown below. It's a bigger, squarer dot than the fabricators/Scout Strider/Hulk/Tanks/Cannon Turret. When you zoom in to the maximum, the shape is much more distinguishable.
Loadout
| Equipment |
|---|
| Stratagems |
|---|
|
|
|
|
|
|
|
|
| Boosters |
|---|
Walkthrough
- If your bunker is immediately within range, throw your
 Orbital Laser. Otherwise, call in your
  Commando and find a good shoot angle from as afar as possible then empty the Commando's 4-shot magazine. However, you may face situations where the other stratagems will help you to destroy your bunker:
 - Orbital Laser if you miss a Commando shot and are close enough to throw it. Alternatively, you can use your
 Ultimatum to complete the destruction of the bunker. it can also be located in an outpost higher than where you are - preventing you from using the Commando.
  Jump Pack may help you cover longer distances and finding a good viewpoint faster.
 Anti-Tank Emplacement may help you taking down your bunker if you miss a Commando shot and find yourself too far away to throw an Orbital Laser. If you have a shoot angle with the Commando, chances are you have a shoot angle with the Anti-Tank Emplacement.
- Perform full squad death rounds to trigger the end of the mission